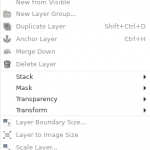
 The layer menu contains nearly 50 commands that are essential to working with layers.
New Layer
Keyboard Shortcut: Shift + Ctrl + N
The new layer command opens up the dialog box from which you can specify details (name/size/fill type) to create a new layer.
New Layer Group
The new layer group command creates a new layer group, which you will see appear immediately in the layers dialog.
New From Visible
The new from visible command merges all visible layers into a new layer that is positioned above all other layers.
Duplicate layer
Keyboard Shortcut: Shift + Ctrl + D
The duplicate layer command creates a copy of the active layer, with “copy” appended to the name.
Anchor layer
Keyboard Shortcut: Ctrl + H
The anchor layer command anchors a temporary/floating layer to the last active layer to be able to work on other layers.
Merge Down
The merge down command merges the active layer with the layer just below it on the layer dialog “stack”.
Delete Layer
The delete layer command deletes the active layer from the image.
The Text Commands of the Layer Menu
Three commands magically appear in the layer menu if a text layer is active, but otherwise are nowhere to be found. They are:
Discard Text Information
The discard text information allows you to discard specific text information and transform the layer into a normal bitmap layer.
Text to Path
The text to path command creates a path from the outline of the text.
Text along Path
The text along path command can bend text to follow a path.
The “Stack” Submenu
Stack commands all fall under a single submenu on the layer menu. They allow you to re-arrange the order of layers, as they are seen in the layers dialog and thus arranged on the image.
Select Previous Layer
Keyboard Shortcut: Page Up
The select previous layer command selects whatever layer is directly above the active layer.
Select Next Layer
Keyboard Shortcut: Page Down
The select next layer command selects whatever layer is directly below the active layer.
Select Top Layer
Keyboard Shortcut: Home
The select top layer command selects the very top-most layer and makes it the active layer.
Select Bottom Layer
Keyboard Shortcut: End
The select bottom layer command selects the very bottom-most layer and makes it the active layer.
Raise Layer
The raise layer command moves the active layer up one position on the layer stack and on the image.
Lower Layer
The lower layer command moves the active layer down one position on the layer stack and on the image.
Layer to Top
The layer to top command moves the active layer to the top of the stack and the image.
Layer to Bottom
The layer to bottom command moves the active layer to the bottom of the stack and the image.
The “Reverse Layer Order” command
Guess what the reverse layer order command does?!!!
The “Mask” Submenu
Layer mask commands all fall under a single submenu on the layer menu.
Layer masks allow you to detail which part(s) of a layer are opaque/transparent/etc.
Add Layer Mask
The add layer mask command opens a dialog that allows you to set mask properties and add it to the active layer.
Apply Layer Mask
The apply layer mask command merges the mask with the active layer.
Delete Layer Mask
The delete layer mask command removes the mask from the active layer.
Show Layer Mask
The show layer mask command makes the image invisible so that you can focus on the layer mask.
Edit Layer Mask
The edit layer mask command makes the layer mask the active component of the active layer.
Disable Layer Mask
The disable layer mask disables the layer mask so that it is not seen on the active layer.
Mask to Selection
The mask to selection command converts the active layer’s mask into a selection.
Add Layer Mask to Selection
The add layer mask to selection command converts the active layer’s mask into a selection added to the selection already active on the image.
Subtract Layer Mask from Selection
The subtract from selection command converts the active’s layer’s mask into a selection (or multiple selections) subtracted from the selection already active on the image.
Intersect Layer Mask with Selection
The intersect layer mask with selection command converts the active layer’s mask into a selection, but only at any point(s) that the mask intersects with a previous selection.
The “Transparency” Submenu
Transparency commands — those which affect the alpha channel — fall under a submenu on the layer menu.
Add Alpha Channel
The add alpha channel command adds an alpha channel to an image or layer.
The alpha channel represents the image’s transparency. Images with only one layer have no alpha channel unless it is added.
Remove Alpha Channel
The remove alpha channel command removes the alpha channel from the active layer.
Color to Alpha
The color to alpha command creates an alpha channel of the active layer with all pixels of the selected color made transparent.
Semi-flatten
The semi-flatten command is useful when you need an anti-aliased image with indexed colors and transparency.
Threshold Alpha
The threshold alpha command makes areas of the active layer transparent or opaque, based on the range between 0 and 255 that you set.
This only works on RGB images, and with layers that have an alpha channel.
Alpha to Selection
The alpha to selection command replaces an existing selection on the active layer with an alpha channel that selects opaque areas, but not transparent areas, and only partially selects translucent areas.
Add Alpha channel to Selection
The add alpha channel to selection command adds a selection in the active layer, from the alpha channel, to the current selection.
It selects opaque areas, but not transparent areas, and only partially selects translucent areas.
Subtract from Selection
The subtract alpha channel from selection command removes a selection from selection in the active layer, from the alpha channel.
Intersect Alpha channel with Selection
The intersect alpha channel with selection command makes a selection in the active layer from the alpha channel that selects opaque areas, but not transparent areas, and only partially selects translucent areas.
The selection is made only where is intersects with a pre-existing selection.
The “Transform” Submenu
Transform commands, that allow you to flip/rotate layers, all fall under a single submenu on the layer menu.
Flip Horizontally
The flip horizontal command flips the active layer from left to right.
Flip Vertically
The flip horizontal command flips the active layer from top to bottom.
Rotate 90° clockwise
The rotate 90° clockwise command rotates the active layer by 90° to the right, around the center.
Rotate 90° counter-clockwise
The rotate 90° clockwise command rotates the active layer by 90° to the left, around the center.
Rotate 180°
The rotate 180° command rotates the active layer by 180°, around the center.
Arbitrary Rotation
The arbitrary rotation command rotates the active layer by an angle specified in the dialog that appears for this command.
Offset
Keyboard Shortcut: Shift + Ctrl + O
The offset command shifts the content of the active layer, and crops anything shifted outside of the layer boundary.
Layer Boundary Size
The layer boundary size command allows you to adjust the size of the layer without scaling its contents.
Layer to Image Size
The layer to image size command allows you to adjust layer boundaries to match image boundaries without changing the layer contents.
Scale Layer
The scale layer command allows you to resize the layer and its contents with parameters specified in the dialog that the command opens.
Crop to Selection
The crop to selection command crops the active layer to the boundary of a selection.
Autocrop Layer
The autocrop layer command allows you to manually define the area to be cropped in the active layer.
Conclusion
The layer menu is a great source of tools, but don’t forget that most of them are also available by right-clicking a layer in the Layers dialog.