Don’t get me wrong; I like having my most-often-used programs clearly visible on my Taskbar, where they are always just a single click away from deployment.
It’s the after-deployment part that’s the problem.
It’s the part where the open programs look identical to the closed programs, and multiple instances of the same program get collapsed under one icon, and I can’t tell what’s going on!
It must be stopped.
Thankfully (for the sake of my sanity), the fix is very simple.
But first, just in case you’re asking “What’s a Taskbar?!”, I’ll slow things down a bit.
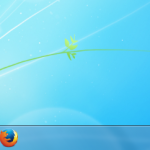
The Taskbar is the horizontal bar that, by default, spans the width of the bottom of your screen. (I say “by default”, because you can move it to any side of the screen that you want.)
![]() The Start button is the Windows logo icon in the left-hand side of the Taskbar. It opens the Start Menu.
The Start button is the Windows logo icon in the left-hand side of the Taskbar. It opens the Start Menu.
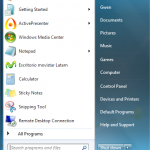 The Start Menu is a good place to start when you want to access any programs, folders, system settings, etc.
Taskbar Properties
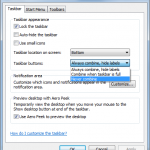 You will see that the Taskbar is “locked”, by default. This prevents you from accidentally dragging it around, but if you want to drag it around to re-position it on your screen, then by all means, un-check the box.
If you choose to Auto-hide the Taskbar, it will virtually disappear unless you are hovering over it or move your mouse into the side of the screen it is hidden behind. This option is both a great space-saver, and very annoying!
If you choose to use small icons, you might start to need glasses pretty soon…
Instead of unlocking the Taskbar and dragging it around, you can leave it locked and choose which edge of the screen the Taskbar inhabits.
And finally, we have arrived at the Taskbar buttons, where I can save my sanity by switching to the “Never combine” option. This will allow multiple instances of the same program to each be displayed separately in the Taskbar. Basically it’s reverting back to Windows settings of old. Who ever said change was good?! Me? Oops. Change is not always good.
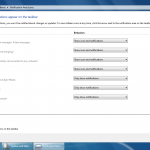 If you choose to customize the “Notification Area” (which I find useful) you can decide which icons you want to see in the far right of your Taskbar at all times. You can also choose which notification icons you never want to see, and which ones you only want to see when there are notifications (usually meaning “problems”, but sometimes just updates). Choose wisely or you may miss important notifications, causing your computer to act in strange and unexpected ways.
The option to “Preview desktop with Aero Peek” is both fun and interesting, allowing you a glimpse of your desktop just by moving your mouse to the very end of your Taskbar. Move your mouse away and the peek is over – your open program will be back in focus. The great part about leaving this setting active, is that it also allows you to jump to your desktop with a single-click on that same spot on the Taskbar.
Start Menu Properties
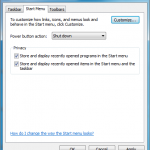 With the Properties menu still open, it’s time to move on to the “Start Menu” tab and explore the settings available there.
First up, you can customize how links, icons, and menus look and behave in the Start menu. If you click Customize, you can pick between several available options. I like the defaults, except in some cases it is nice to increase or decrease the number of recent programs displayed in the Start menu.
The “Power button action” allows you to determine what button shows up in your Start menu as the default/primary option available to shut down, log out, etc. The other actions are always available, but slightly more hidden; if you use another action more often than “Shut down”, consider making it the default action button.
If you don’t need Privacy, and/or want Start Menu shortcuts to the programs that you’ve opened most recently, leave both check boxes checked. I prefer to check the first option, to store and display recently opened programs in the Start Menu, but not the second, as I like to have complete control over my Taskbar.
Toolbar Properties
With the Properties menu still open, you can choose on the Toolbars tab which Toolbars you want to see. If any.
I tend to skip Toolbars, but they are still interesting to explore.
Conclusion
These basic settings will give you a good start in setting up your Windows installation so that it becomes a comfortable environment for you to use.
Next week we’ll learn how to change which program icons (shortcuts) appear on the Taskbar, Start Menu & Desktop.

