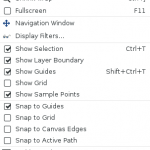
 Gimp’s view menu includes commands that affect visibility and appearance of images and the Gimp interface.
New View
The new view command creates a new window, or tab, allowing you to view the same image multiple ways (different zoom sizes, etc.)
Note that each view is still of the same images; changes to one view will be made in the other views, whether or not that part of the image is in focus at the time or not.
Dot for Dot
The dot for dot command is useful for icons/web graphics/etc. but not for to-be-printed media, as it displays each pixel at 100%, as one pixel on the screen, vs. showing the real size.
Zoom
The zoom command comes with an entire submenu of its own, allowing you to zoom in/out, fit the image in the window, fill the window, or choose from several zoom ratios available.
Shrink Wrap
Keyboard Shortcut: Ctrl + J
The shrink wrap command resizes the window so that the image fits in the screen without excess canvas shown, as best it can with the proper circumstances.
Full Screen
Keyboard Shortcut: F11
The full screen command allows you to toggle whether or not Gimp takes up the entire screen.
Navigation Window
The navigation window command opens the navigation dialog, to allow you to more easily move the image on the canvas, and/or move around in the image.
Display Filters
The display filters command show the filter dialog box.
Show Selection
Keyboard Shortcut: Ctrl + T
The show selection command toggles whether or not the selection boundary line is solid or dotted/animated.
Show Layer Boundary
The show layer boundary command toggles whether or not the dotted line around the boundary of your image is enabled or disabled.
Show Guides
Keyboard Shortcut: Ctrl + Shift + T
The show guides command enables and disables the guide overlay feature.
Guides are reference lines that can be created as extensions to the ruler, displayed as lines over your image.
Guides can be created by clicking on a ruler and dragging a line (guide) onto your image, wherever it is needed. You can select and drag guides to move them at any time, or drag them back into the ruler to remove individual guides from view.
Show Grid
The show grid command enables and disables the grid overlay feature.
Show Sample Points
The show sample points command (toggle), when enabled, allows 4 unique sample points to be seen on the screen, if the points are selected.
Sample points are picked by holding down the Ctrl key, clicking on the ruler, and dragging the crosshairs to a point on the image. Details about the selected sample points (colors) are shown in the sample points dialog.
Snap to Guides
The snap to guide command, when enabled, helps you place image elements by pulling toward guide points when a selection or layer is moved.
Snap to Grid
The snap to grid command, when enabled, helps you place image elements by pulling toward grid points when a selection or layer is moved.
Snap to Canvas
The snap to canvas command, when enabled, helps you place image elements by pulling toward the canvas edge when a selection or layer is moved near it.
Snap to Active Path
The snap to active path command, when enabled, helps you place image elements by pulling on the next anchor point of the active path when a selection or layer is moved.
Padding Color
The padding color command changes the padding color — the canvas color below/surrounding images — to light/dark/darker or even a custom color.
Show Menubar
The show menubar command allows you to toggle whether or not the menubar is enabled/shown.
If you *ahem* accidently loose the menubar by clicking on the toggle option to disable it (don’t ask me how I know!) you can right-click on an open image and toogle it back via the menu options that are displayed.
Show Rulers
Keyboard Shortcut: Shift + Ctrl + R
The show rulers command allows you to toggle whether or not the rulers are enabled/shown.
Show Scrollbars
The show scrollbars command allows you to toggle whether or not the scrollbars are enabled/shown.
Show Statusbar
The show statusbar command allows you to toggle whether or not the statusbar is enabled/shown.
