 Solid colors are all very well and good, but a little variety is nice, too.
Gradients and patterns can add that variety. They can also add too much variety, but used wisely, they can be just right.
Palettes and colormaps are useful additions to the party, so we’ll cover the basics of all these in this lesson.
Gradients
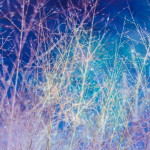
 A gradient is a smooth transition between two or more colors.
You can paint with a gradient as the color, and/or fill a selected area with a gradient.
The gradient dialog can be set up several ways:
1. You can keep the dialog box open and dock-able via the Windows > Dockable Dialogs > Gradients menu.
2. You can add the dialog box as a tab to many existing dialogs by clicking on the tab icon (![]() ) and selecting Add Tab > Gradients.
) and selecting Add Tab > Gradients.
3. These tabs and dialog boxes can be dragged around to re-arrange them and/or toggle them between tabs and dialog boxes.
Painting With Gradients
To paint with a gradient, select a paint tool (pencil, paintbrush, airbrush, etc.) and choose “Color from gradient” from the “Dynamics” box in the options. Then proceed to use the tool as you normally would.
(There are some other really cool effect in the Dynamics drop-down, BTW!)
Filling (Blending) With Gradients
![]() The blend tool, which looks like a gradient-filled square, is used to fill a selected area with a selected gradient.
The blend tool, which looks like a gradient-filled square, is used to fill a selected area with a selected gradient.
Click on the tool, then choose a gradient, and a shape, etc. from the toolbox options that appear.
In your selected area (or beginning/ending outside the area, for additional effects!), click and drag your cursor along the angle you want the gradient to be applied.
When you let go of your mouse, you’ll see the result, so experiment a bit, and in no time at all you’ll be a pro at making the gradients do what you want them to do.
How to Create a New Gradient
Gimp gives you the option of creating new gradients by setting up the colors yourself.
There are a variety of methods that can be used to create a gradient, but they are all very similar, so I’ll explain the one that seems to be the most thorough.
Open the gradient dialog box, click on the tab icon (![]() ), and select Gradients Menu > New Gradient.
), and select Gradients Menu > New Gradient.
Immediately a greyscale gradient will appear in the list, called “Untitled”. You can give it a name now or later.
There are various ways to adjust the colors of your new gradient, but one is to set the foreground and background colors and then right-click on the gradient editor color screen and select Left Color Type and/or Right Color Type to assign a foreground or background color to each one.
Saving the gradient is another matter entirely… if anyone knows how to get the gradient to save (with colors intact!), let me know, because the “Save” button in the gradient editor doesn’t work for me!
Patterns
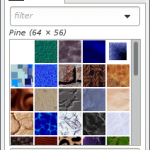 A pattern (also known as a texture) is an image that is tiled to fill an area.
Patterns can be used with the bucket fill tool, the clone tool (to paint), and by stroking an elliptical selection.
The patterns dialog can be set up several ways:
1. You can keep the dialog box open and dock-able via the Windows > Dockable Dialogs > Patterns menu.
2. You can add the dialog box as a tab to many existing dialogs by clicking on the tab icon (![]() ) and selecting Add Tab > Patterns.
) and selecting Add Tab > Patterns.
3. These tabs and dialog boxes can be dragged around to re-arrange them and/or toggle them between tabs and dialog boxes.
How to Add a New Pattern
In current versions of Gimp, any .pat, .png, .jpg, .bmp, .gif, or .tiff file can be used as a pattern.
Begin by finding out which directory your patterns are located in by right-clicking a pattern and selecting “Open Pattern as Image”.
With the image open, go to File > Save As and take note of the directory and path to the directory before canceling.
Copy your new pattern file to the directory indicated in the previous step, or open it in Gimp and save it to the directory.
Voila! New pattern!
Check out File > Create > Patterns if you’re interested in exploring how to create your own pattern, especially of the variety that can be tiled with seamless edges.
Palettes
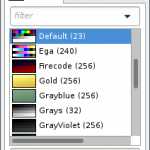 A palette is a set of discrete colors.
There are an average of 40 default Gimp palettes to choose from, and more can be created or added.
Palettes can be useful when you want to work with a specific range of color options, especially in recurring instances when you need access to the same specific set of colors again and again.
The palettes dialog can be set up several ways:
1. You can keep the dialog box open and dock-able via the Windows > Dockable Dialogs > Palettes menu.
2. You can add the dialog box as a tab to many existing dialogs by clicking on the tab icon (![]() ) and selecting Add Tab > Palettes.
) and selecting Add Tab > Palettes.
3. These tabs and dialog boxes can usually be dragged around to re-arrange them and/or toggle them between tabs and dialog boxes.
The palettes in the dialog can be viewed as a list (default) or in a grid pattern.
Simply click on a palette in the dialog box to select it, and when you go to the color selection dialog box’s palette tab, the selected palette will be shown for you to select a color from.
You can edit, create, duplicate, and delete palettes, along with many other options, via the Palettes Menu found by clicking on the tab icon (![]() ).
).
How to Add a New Palette
 There are several ways to add a new palette to Gimp’s selection, if you have a .gpl palette file:
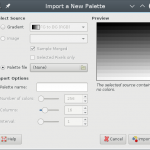
1. In the palette dialog, click the tab icon (![]() ) and select Palettes Menu > Import Palette…. In this window you can toggle the “Palette file” option and browse to the file’s location to select it. From this same window, you can also import a gradient as a new palette.
) and select Palettes Menu > Import Palette…. In this window you can toggle the “Palette file” option and browse to the file’s location to select it. From this same window, you can also import a gradient as a new palette.
2. In Linux, you can copy the .gpl palette file to the /home/gwen/.gimp-2.8/palettes/ directory (replacing the user name and Gimp version as needed, of course.)
The Colormap Dialog
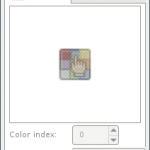 The colormap dialog works only with indexed images, or images that use a maximum of 256 unique colors.
The colormap itself is a look-up table for referencing the color assigned to each pixel in the image.
An image can be indexed by going to Image > Mode > Indexed on Gimp’s menu.
You can access the colormap dialog via the Windows > Dockable Dialogs > Palettes menu or by adding it as a tab to many existing dialogs.
The colormap dialog allows you to edit, add, change, etc. any of the indexed colors for your image.
Conclusion
And so concludes the sub-series on Coloring in Gimp, allowing us to return to other Gimp topics.
I’ll be back in a jiffy!
(Or in two weeks.)
(But that’s still a jiffy, right?)