 It is now officially the last week of spring — until next year. Have you finished your spring cleaning yet?
More specifically, have you cleaned your PC yet, or did you just clean around it, not entirely sure how to go about cleaning its various surfaces safely?
It turns out that computers are not quite as easy to break as one might initially believe, so pull out your dust blaster, clean cloths and a paintbrush; let’s get to work.
How to Clean a Computer
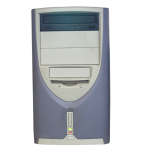 The top and sides of a computer case can easily be cleaned with a few swipes of a damp cloth. Cables — even the cables that are so dusty that you’re trying to remember if you cleaned them last spring — can similarly be pulled gently through a folded damp cloth to polish them up.
Underneath a computer can be hidden a wealth of dirt, dust, cat toys, coins… oh, wait. I’m confusing it with the couch.
The case’s front and back of the computer case, however, with all of their ornamental shaping, sockets and ledges, are another story entirely. That job calls for a few reinforcements.
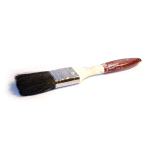 A clean paintbrush is my favorite tool when cleaning an uneven surface. A few quick strokes back and forth (start at the top and work your way down on the surface), with attention to small crevices, will dislodge the accumulated dust and send it flying back into the air to re-accumulate later. Uh, on second thought, maybe using the paintbrush in conjunction with a vacuum cleaner would be ideal.
A dust blaster will also help to clean hard-to-reach and/or delicate surfaces; I find it very useful to clean the insides of a computer, and also for keyboard-cleaning.
Compressed air is my least favorite cleaning tool. Unlike other options, it eventually runs out. But, it’s fun while it lasts (blasts)!
How to Clean a Computer Monitor Screen
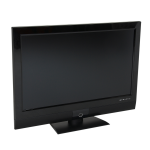 Start by turning off your monitor or screen. It is much easier to see dust and smudges on a black surface, and if you have a touchscreen… well, I’ll leave it to your imagination what could possibly happen if you try to clean an active touchscreen!
Use a microfiber cloth or a clean cotton t-shirt to gently wipe the screen in a circular pattern.
For tough smudges, lightly spray a 50/50 solution of water and vinegar on your cloth and continue to wipe. Don’t scrub. Persistence is key in this instance, not elbow grease.
Allow the screen to dry on it’s own (blowing on it to speed up the process will only mean you have to wipe it again to remove saliva!) and then turn it back on and enjoy in all it’s dust-free smudge-free glory for the next 20 minutes until it gets smudged again.
Alternatively, introduce a new rule: Don’t touch the screen.
Ok, now you sound just like my Dad.
How to Clean the Mouse
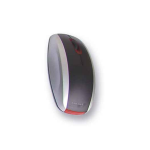 The modern optical mouse is easy to clean, requiring little more than the occasional swipe of a damp cloth and a little paintbrush-dusting attention around the buttons and related crevices.
How to Clean the Keyboard
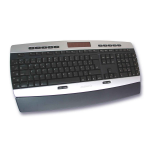 Keyboards (those wonderful collectors of dust-balls and crumbs) are surprisingly cleanable, with the right tools and a little effort.
Begin by unplugging the keyboard, or start when your computer is off (especially in the case of laptops). Cleaning your keyboard while it is still plugged in is like asking for strange and disastrous things to happen.
To dislodge dust/crumbs/hair/etc. from between the keys, begin with either a paintbrush or a dust blaster. I find it helpful to tilt the keyboard forward or even hold it upside-down during this process, allowing for the particles to free themselves and fall out. A few gentle taps on the sides are also helpful.
If a deep-cleaning is necessary, each key can be pried off of the keyboard temporarily. The keys can be cleaned separately, and the keyboard can be dusted without keys in the way. The keys will snap back on, but make sure they’re dry first. Also, make sure each key gets put back in its proper place, whether by remove/replacing one at a time, or by taking a photo of your keyboard layout before you begin. There’s a good typing game; see if you can remember where each key should go!
A damp cloth can be used on the key and keyboard surfaces to clean off any lingering dust. Using isopropyl alcohol to dampen your rag has the added bonus of (somewhat) de-germing the keyboard. A dampened cotton swab (with water or isopropyl alcohol) can be used to further clean between the keys.
On occasion, a keyboard may be too far gone for cleaning to be successful. If you’re particularly accident-prone, I recommend trying out a waterproof keyboard, which not only protects against accidental spillage, but also against the build-up of dust/etc. that inevitably collects.
Final Notes
After cleaning your computer, it’s a good rule of thumb to go through a simple two-part checklist:
1. Are there any loose cables?
2. Were any buttons on the computer/monitor/voltage regulator/etc. accidentally pushed and need corrected?
…because in my experience, if a computer comes down with some strange ailment that can be traced back to either of these problems, my first question is “Did someone clean today?”.
Sorry Mom! (And thanks for cleaning the house!)
