 The premise: A beautiful Saturday, with a cool breeze, a cloudless sky, and the outdoors calling my name.
The catch: I had work to do.
The problem: I turned on my computer to start working, and could barely even see the screen.
Now, one might automatically assume that I needed glasses (I don’t), or that the bright sun was reflecting on my screen (to taunt me), but this was not the case.
My computer had somehow, between being turned off the evening before and being turned back on that morning, managed to lower the screen brightness by a significant percentage. Almost like it had a mind of its own and was encouraging me to enjoy the sunshine while it lasted.
It didn’t work; I simply fixed the settings and got on with my day.
How the settings changed in the first place will remain a mystery. In the meantime, I will share with you the simple steps that you can take, to adjust the screen brightness settings on both Fedora Linux KDE and Windows 7.
How to Adjust Monitor Screen Brightness
On some monitors there is a “brightness” button, often identified by an icon such as a sun. Alternatively, you can navigate to the brightness settings by opening up the Menu or Options. Then, adjust the brightness as indicated, usually by pressing the up/down buttons. If all else fails, read the manual that came with your monitor. You saved that, right?!
How to Adjust Screen Brightness on a Laptop
On a laptop, adjusting the screen brightness is as simple as holding down the FN (function) key while pressing whichever functions keys are labeled to increase/decrease brightness (in my case the F2 and F3 keys). Let go of all the keys and you’re done!
How to Adjust Windows 7 Screen Brightness Settings
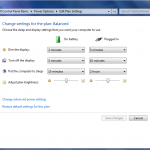
Go to Start > Control Panel > Display and click on “Adjust Brightness”. Notice that you will be taken to “Power Options”, and that you could have gone directly to Start > Control Panel > Power Options. Live and learn!
First off, notice that you have two Power Options (each of which are adjustable). The default “Balanced” plan allows more time to pass than the optional “Power saver” plan, before the display is dimmed, turned off, or the computer put to sleep, due to inactivity.
 Click on “Change plan settings” for your selected plan.
The fourth option for both “On battery” and “Plugged in” settings is “Adjust plan brightness”, and you can drag the indicators to the right to increase brightness, and to the left to decrease brightness.
Save changes to apply them, and you’re good to go.
How to Adjust KDE Linux Screen Brightness Settings
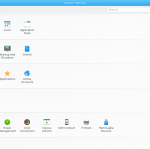
 Go to Application Launcher > Applications > Settings > System Settings.
Under “Hardware”, click on “Power Management”. Here, in the default section on Energy Saving, you have tabs for “On AC Power”, “On Battery”, and “On Low Battery”. In each tab, the options are the same, but the defaults are different.
To adjust increase/decrease the brightness on any tab, make sure the “Screen Brightness” box is checked (filled out) and then drag the slider left to decrease the brightness, or right to increase the brightness.
Additionally, in the same window, details such as time before screen dimming/switch-off and button event handling can be adjusted.
When you’re finished, Apply the changes and close the window. Depending on the changes made, they make take some time or a restart to show up.
Conclusion
Screen settings are easy to adjust, and can make a big difference in overall user experience.
Make sure to find the adjustments that work best for you.
